Getting Started Guide
The BlazerTech Debug Console was created with the goal of ease of use, once the package has been imported only minimal setup is required to be operational.
---Setup---
- Once downloaded, double click the file to start the installation (Note a Unity project must be open), a new window should appear within Unity
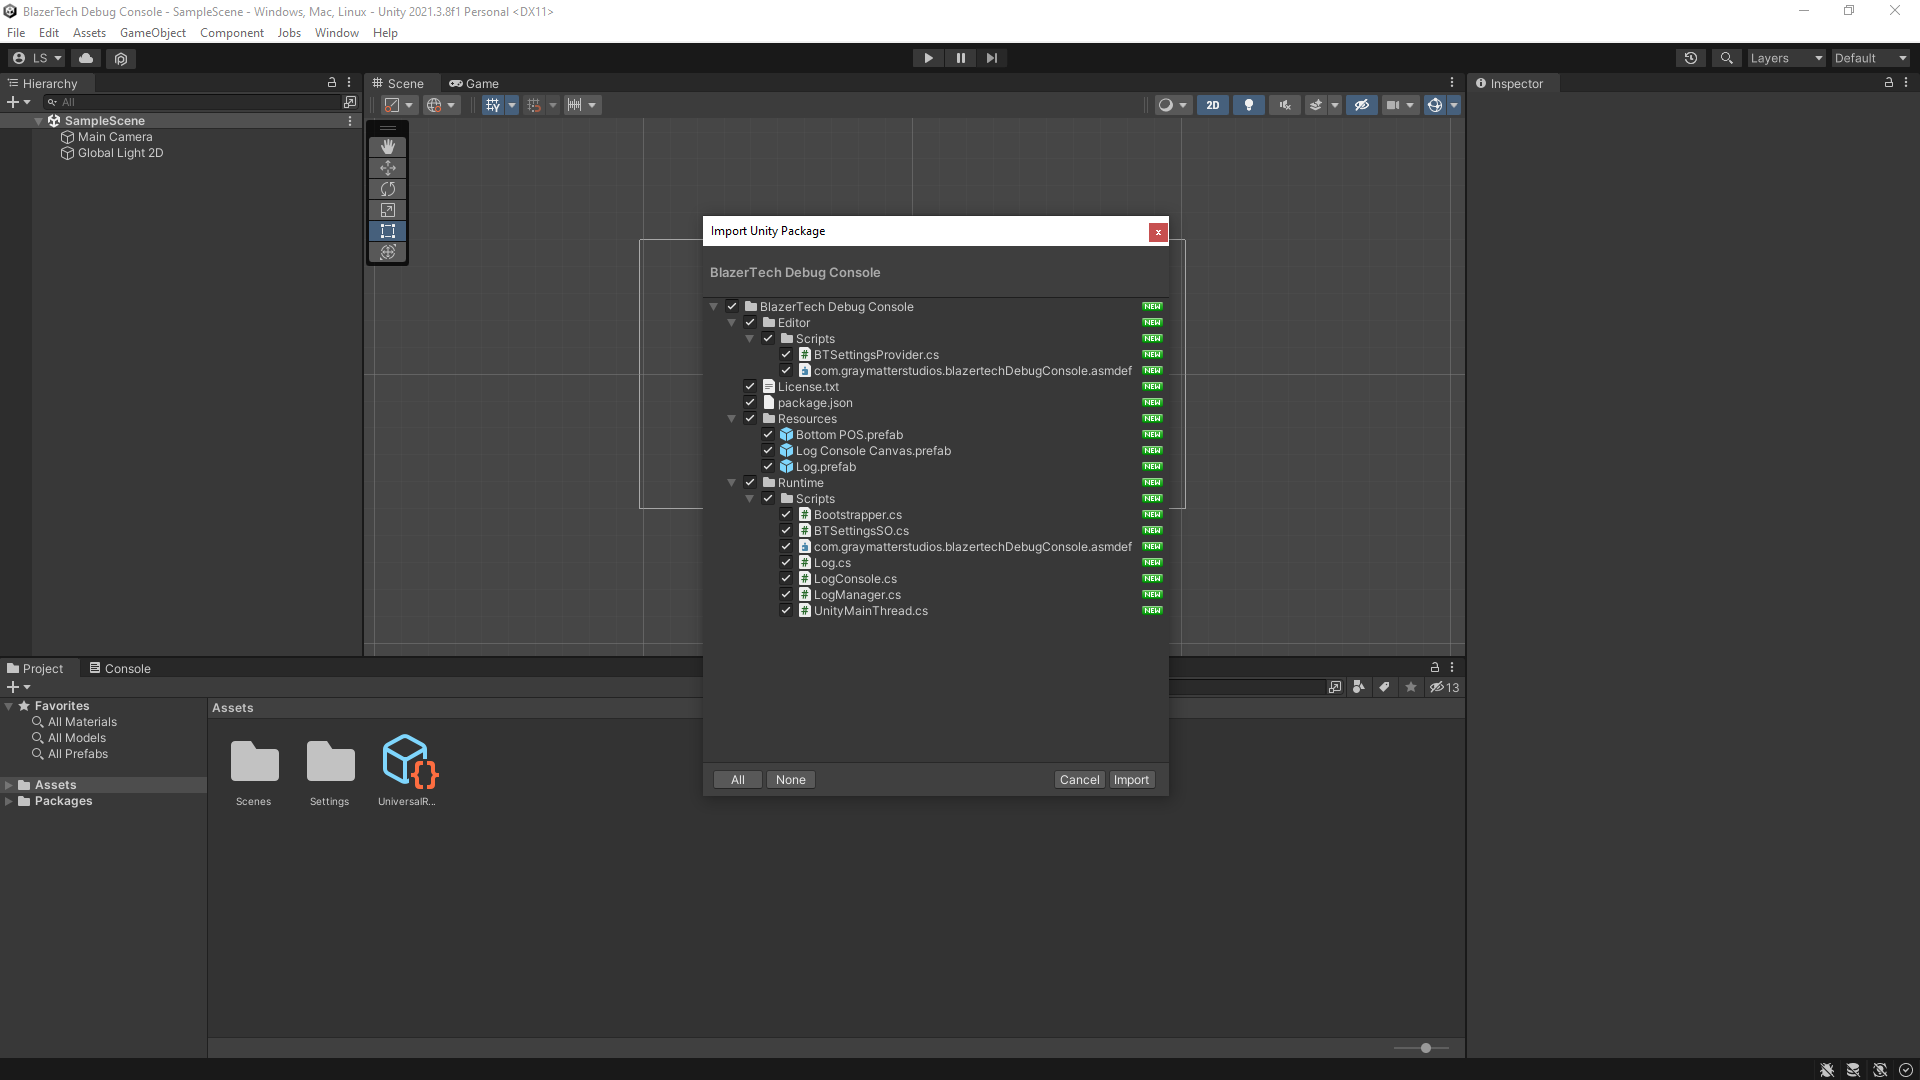 Make sure everything is selected and click "Import", if any errors appear in the console you can safely ignore them if they disappear when you clear the console.
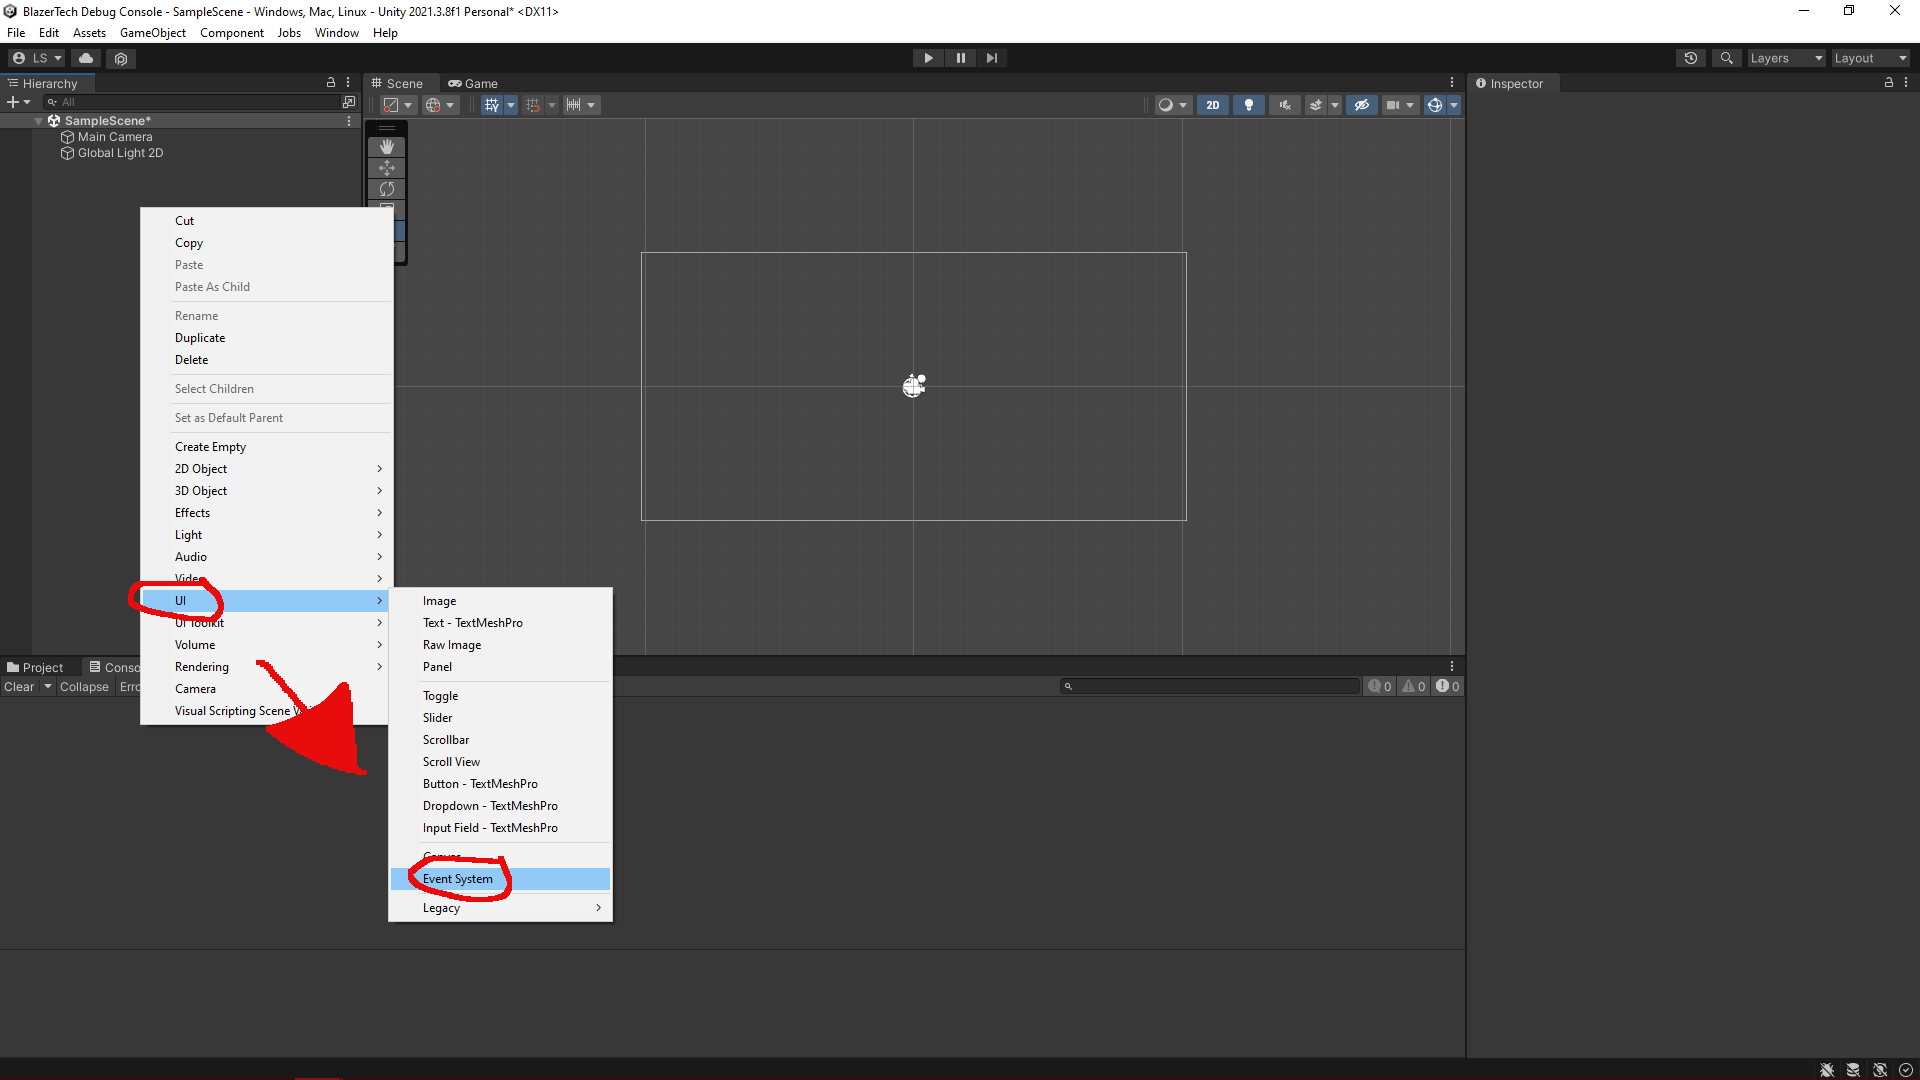
 - Make sure there is an event system in the scene so you can interact with the console, to add an event system right click in the "Hierarchy" window > UI > Event System
- The console uses TMP (Text Mesh Pro) to render text so make sure that's installed, adding any TMP object into the scene will prompt you to import TMP into your project, to add a TMP object into your scene right click in the "Hierarchy" window just like in the last step, go to UI and add anything that includes the words "TextMeshPro" such as "Text - TextMeshPro" for example, otherwise you will be prompted to install TMP when running the game.
- If you're using the old input system then you're done with setup, now run your game and press F2 to toggle the debug console! If you're using the new input system scroll down to the "New Input System Setup" section.
---Editing Settings---
By going to Edit > Project Settings > BlazerTech Debug Console you can edit a multitude of settings, these settings include the following:
- Log Cap - The total amount of logs that can be shown before logs stat getting replaced.
- Font Size - The size of the log text in the console.
- Log File Cap - the max amount of log files that can be created before they start getting replaced, set to 0 to disable log files all together.
- Background Color - The color of the background of the console.
- Clear Console On Scene Change - Whether or not to clear the console when the current scene changes (Does not effect log files), defaults to true.
- Active Input System - The input system used to open/close the console, defaults to use the old input system. set to none to use your own system.
- Toggle Console Key - The keybind used to open/close the console, only active when using the old input system.
--New Input System Setup---
Due to complications setup with the new input system is a bit more complicated, there's no built in way to toggle the debug console with the new input system, so you'll need to make your own, within any class you can go into the "LogManager" class, use "LogManager.Instance" to get the current instance of the debug console, within there you can call "LogManager.Instance.ToggleConsole();" to toggle the console on/off, or if you want to implicitly set it on/off you can call "LogManager.Instance.SetConsoleActive(value);" replace "value" with true/false depending if you want to to turn the console on or off.
---Sample Scene---
Within "BlazerTech Debug Console" > "Samples" > "BlazerTech Debug Console Example" is a sample scene demonstrating how the debug console works, Within the scene press F2 to toggle the console on/off, then you can press each button on the screen to generate different types of logs, or press the number keys.